

Regularly maintaining your gardening tools is one of the simplest ways to improve your gardening experience. Clean, sharp, and well-cared-for tools not only last longer but also perform better when digging, pruning, planting, weeding, and transplanting. A few minutes of maintenance after each gardening session can save money, reduce frustration, and help keep your garden looking its best.
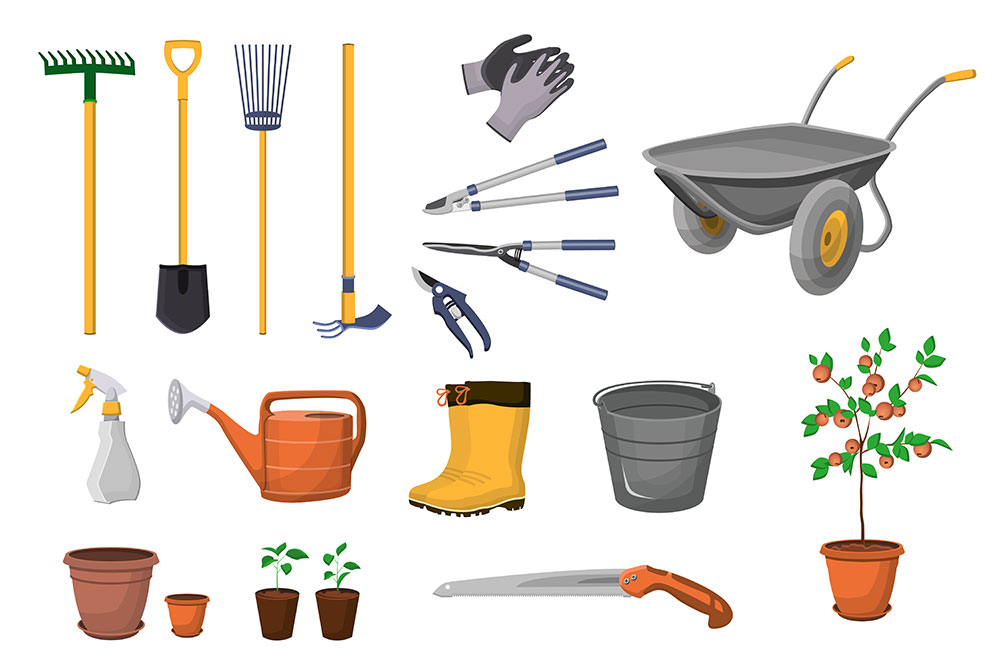
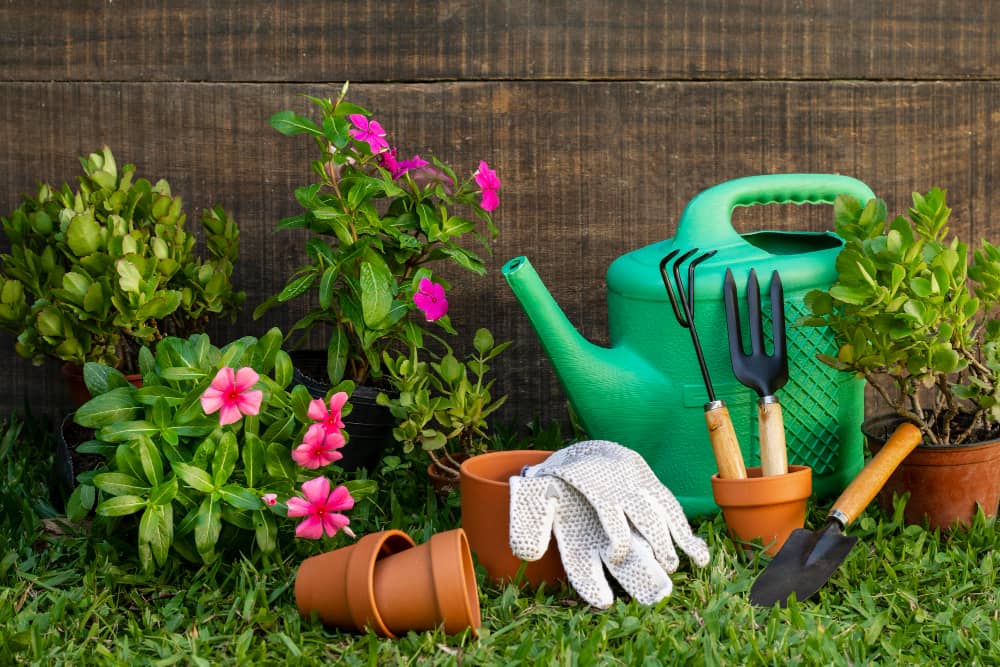
Whether you are a beginner gardener tending a few containers or an experienced grower managing a large landscape, your tools are among your most valuable gardening assets. Shovels, pruners, trowels, hoes, garden forks, and watering equipment all work hard throughout the growing season. Without proper care, however, these tools can become rusty, dull, damaged, and less effective over time.
Many gardeners focus heavily on caring for their plants while overlooking the maintenance of the equipment they use every day. Neglected tools can make gardening tasks more difficult, increase the risk of plant damage, and even create safety hazards. Fortunately, keeping gardening tools in excellent condition does not require much time or effort.
Sustainable gardening practices can also help reduce maintenance while creating a healthier growing environment for plants and beneficial wildlife.
In this guide, you’ll discover simple and practical tips for maintaining your gardening tools, including proper cleaning, sharpening, lubrication, storage, rust prevention, and seasonal care. By following these maintenance practices, you can extend the lifespan of your tools and ensure they remain reliable year after year.
Over the years, I’ve learned that a few minutes spent maintaining gardening tools after each gardening session can save hours of frustration later. Properly cleaned and sharpened tools perform better, last longer, and make gardening considerably more enjoyable.
Tips for Maintaining Your Gardening Tools
Proper gardening tool maintenance helps keep your equipment safe, effective, and ready for use whenever you need it. Well-maintained tools make gardening tasks easier, improve efficiency, and can significantly extend the lifespan of your investment. From hand trowels and pruners to shovels and garden forks, every tool benefits from regular care and attention.
The good news is that maintaining your gardening tools doesn’t require a lot of time or specialized equipment. Simple habits such as cleaning tools after use, storing them properly, sharpening blades, lubricating moving parts, and protecting metal surfaces from rust can make a noticeable difference. Regular inspections can also help identify minor issues before they become costly repairs or replacements.
The following gardening tool maintenance tips will help keep your tools in excellent condition throughout the growing season and for many years to come.
Tip 1: Clean Your Tools after Every Use
One of the simplest yet most effective ways to maintain your gardening tools is to clean them after every use. Soil, plant sap, moisture, and organic debris can quickly build up on tools, reducing their effectiveness and increasing the risk of rust, corrosion, and the spread of plant diseases. Spending a few minutes cleaning your tools after gardening can significantly extend their lifespan.
Begin by removing any loose dirt or debris from the tool. A stiff brush works well for cleaning shovels, trowels, hoes, and garden forks, while pruners and cutting tools may require a cloth to remove sap and plant residue. For most tools, a mild mixture of soap and water is sufficient to remove dirt and grime. Heavily soiled tools may require additional scrubbing to restore them to good condition.
After cleaning, rinse the tools thoroughly with clean water and dry them completely with a soft cloth. Moisture left on metal surfaces can lead to rust formation, especially during humid weather or when tools are stored for long periods. Pay particular attention to joints, hinges, and wooden handles where moisture can accumulate.
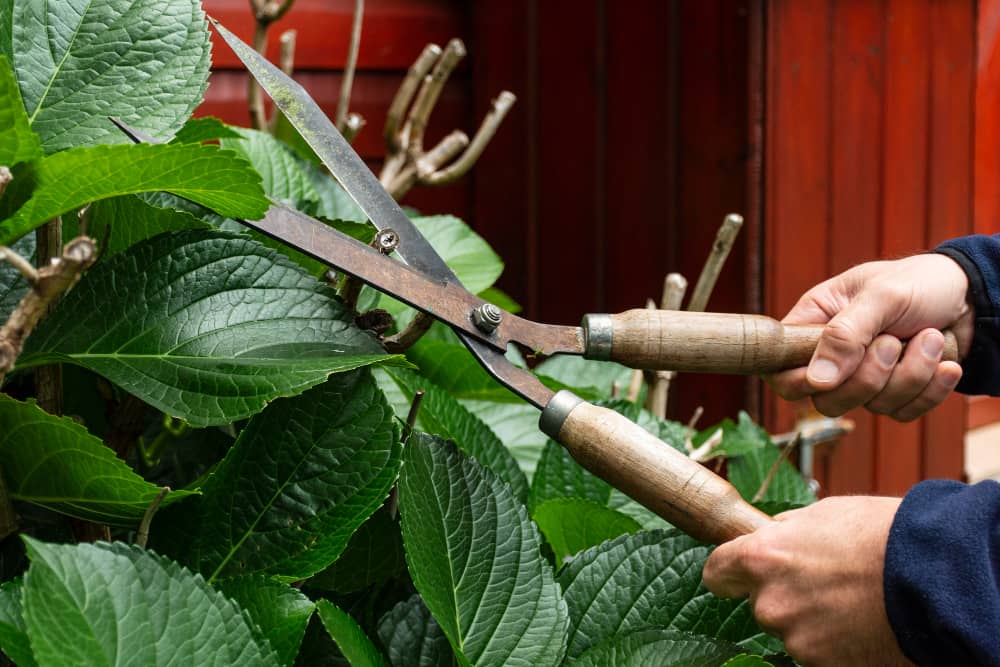
For cutting tools such as pruners, loppers, and hedge shears, consider disinfecting the blades occasionally, especially after working with diseased plants. A simple disinfectant solution can help prevent the spread of plant diseases throughout your garden.
Clean tools are especially important when growing edible herbs and tea plants because they help reduce the spread of diseases between plants.
Once your tools are clean and dry, store them in a cool, dry location. Proper storage combined with regular cleaning helps keep gardening tools in excellent condition, improves their performance, and reduces the need for costly replacements.
Making tool cleaning part of your gardening routine is one of the easiest ways to protect your investment and ensure your equipment remains ready for every gardening task.
Tip 2: Properly Store Your Tools
It is essential to store your gardening tools properly to ensure they are in the best condition for years to come. Improper storage can cause your tools to rust, warp, break, and damage beyond repair. To avoid these consequences, here are a few tips to ensure your tools are properly stored.
The first thing to consider is storage conditions. For optimal storage, keeping your tools in a dry area away from any moisture is best. This means keeping your tools in a shed, garage, shelves, or other dry storage space. Avoid leaving them outside, as the elements can easily damage them. Also, be sure to keep your tools away from outdoor pests like rodents, which can cause significant damage to your tools.
The next tip is to ensure your tools are properly stored and not just thrown together in a pile. This will help ensure that the tools are organized, easily accessible, and stored in a manner that preserves their condition. Investing in a tool rack or toolbox to store your tools is a great way of doing this. This will help you keep them neatly organized and easily find when needed.
When storing your tools in a toolbox, place them in the correct compartments. This will help keep them safe and prevent them from becoming jumbled up. You should also ensure the toolbox is secure and tightly sealed to avoid moisture from getting in and potentially causing rusting or warping.
In addition, if you are storing tools in a shed or garage, you should ensure they are off the ground. This will help protect them from any moisture that may come into contact with them. You should also ensure the area is well-ventilated to prevent the tools from being damaged due to lack of air circulation.
Finally, it is essential to ensure that your tools are stored away from any heat sources. This will help prevent the tools from warping or damaging due to extreme temperatures. Ensure they are stored in an area that is no hotter than room temperature.
By following these simple tips, you can ensure that your gardening tools are properly stored and in the best condition for years. With proper storage, you can rest assured that your tools will be in top shape whenever needed.
Tip 3: Sharpen Your Tools Regularly
Keeping your gardening tools sharp is one of the most important aspects of proper tool maintenance. Sharp tools make gardening tasks easier, require less effort, and produce cleaner cuts that are healthier for plants. Whether you’re pruning shrubs, trimming branches, edging garden beds, or cutting through roots, a sharp blade improves both efficiency and precision.
Over time, regular use causes tool edges to become dull. Dull blades can crush plant stems instead of cutting them cleanly, potentially making plants more vulnerable to disease and pest problems. They also require more force to use, which can lead to fatigue and increase the risk of accidents.
Several gardening tools benefit from regular sharpening, including pruners, loppers, hedge shears, hoes, shovels, spades, and garden knives. The frequency of sharpening depends on how often the tools are used, but most gardeners find that sharpening cutting tools once or twice per growing season helps maintain peak performance.
To sharpen your tools, you can use a sharpening stone, metal file, diamond sharpener, or specialized sharpening tool designed for gardening equipment. Follow the original angle of the blade and work slowly to avoid removing too much metal. After sharpening, wipe the blade clean and apply a light coat of oil to help prevent rust and corrosion.
While sharpening, take the opportunity to inspect your tools for damage, excessive wear, or loose components. This simple maintenance routine not only improves performance but can also extend the lifespan of your gardening equipment for many years.
Regular sharpening keeps your tools working efficiently, protects your plants from unnecessary damage, and makes every gardening task more enjoyable and productive.
Tip 4: Inspect Your Tools Before Use
One of the easiest ways to prevent accidents and extend the lifespan of your gardening tools is to inspect them before each use. A quick inspection only takes a few minutes but can help identify problems before they become safety hazards or lead to costly replacements.
Start by examining the metal components of your tools. Look for cracks, chips, bends, or signs of excessive wear that could affect performance. Even small defects can worsen over time, especially when tools are used for demanding gardening tasks. If you discover significant damage, repair or replace the tool before using it.
Next, check for rust, corrosion, or pitting on blades and metal surfaces. Rust can weaken tools and reduce their effectiveness. Remove any rust as soon as possible and apply a light coat of oil to help protect the metal from further deterioration.
Pay close attention to handles, grips, and connection points. Wooden handles should be free of cracks, splinters, or loose sections, while fiberglass and metal handles should be checked for structural damage. Tighten any loose bolts, screws, or fasteners to ensure the tool remains stable during use.
For cutting tools such as pruners, loppers, and hedge shears, inspect the blades for sharpness and proper alignment. Dull or misaligned blades can damage plants and require more effort to use. Sharpen or adjust them as needed to maintain clean and efficient cuts.
Making tool inspections part of your regular gardening routine can improve safety, enhance performance, and help your equipment last much longer. Catching small problems early is often far easier and less expensive than dealing with major repairs or replacing damaged tools later.
Tip 5: Handle Your Tools with Care
Properly handling your gardening tools is just as important as cleaning and maintaining them. Even high-quality tools can become damaged prematurely if they are used incorrectly or handled carelessly. Developing good habits when using, carrying, and storing your tools can help extend their lifespan while improving safety in the garden.
Always use the appropriate tool for the task at hand. Trying to use a hand trowel for heavy digging or using pruners to cut branches that are too thick can strain the tool and cause unnecessary damage. Using the right tool not only makes the job easier but also helps prevent breakage and excessive wear.
Pay attention to how you use your tools during gardening tasks. Avoid twisting, prying, or forcing tools beyond their intended purpose. Excessive force can bend metal components, loosen handles, and reduce the overall effectiveness of the tool. For cutting tools such as pruners, loppers, and hedge shears, allow the sharp blades to do the work rather than applying excessive pressure.
When transporting tools around the garden, carry them carefully and keep sharp edges pointed away from your body. Larger tools should be carried securely using both hands when necessary. Never leave tools lying on walkways, lawns, or garden paths where they can create tripping hazards or become damaged.
Proper storage is also part of handling your tools with care. After use, return tools to a designated storage area where they will remain clean, dry, and protected from the elements. Hanging tools on racks or organizing them in a storage shed helps prevent accidental damage and keeps them readily accessible.
By treating your gardening tools with care and respect, you can reduce wear and tear, improve safety, and ensure that your equipment remains reliable for many growing seasons to come.
Tip 6: Use the Right Tools for the Right Task
It is essential to use the right tools for the right tasks when it comes to gardening. Not only will this make the task more accessible and more efficient, but it will also ensure the longevity of your tools. Understanding what each tool is intended for and how to use it properly is essential.
The most common tools for gardening are shovels, spades, trowels, pruners, rakes, hoes, and hand cultivators. Each of these tools has a specific purpose and should be used accordingly. A shovel can dig a hole or move dirt and soil, but it should not be used for finer tasks such as weeding or pruning. On the other hand, a trowel is perfect for smaller jobs such as planting seeds or weeding, but it is not intended for digging larger holes or moving soil.
Similarly, pruners are intended for trimming and cutting, while hoes are better suited for weeding and digging around plants and small roots. Rakes are best for raking up leaves and debris, while hand cultivators are used for loosening and aerating soil.
When selecting the appropriate tool for a job, it is important to consider the size and weight of the tool. If you are dealing with a small area, you will likely want to opt for a lighter, smaller tool. You should also consider the type of soil you are dealing with; a heavier tool may be needed for harder soils, while a lighter tool may be preferred for softer, looser soils.
Finally, inspecting your tools before applying them to a job would be best. Ensure they are in good condition and that the metal has no nicks or breaks. If you find any damage, it is important to repair or replace the tool before using it.
Using the right tools for the right task is essential to maintaining your gardening tools. Not only will it make the job easier, but it will also help to extend the life of your tools. With the right tools and the proper maintenance, you can enjoy your gardening projects for years.
Tip 7: Lubricate Your Tools
When it comes to maintaining your gardening tools, lubrication plays an important role. Without proper lubrication, your tools will eventually become difficult to use and break down due to wear and tear. For this reason, it is essential to regularly lubricate your tools to ensure that they stay in working condition.
The first step in adequately lubricating your tools is to identify the type of lubricant best suited for the job. For general upkeep, a lightweight oil or grease is usually recommended. It is essential not to use too much lubricant, which can create a mess. Instead, use just enough lubricant to create a thin, protective coating on the tool. If you use a liquid lubricant, wipe off any excess with a clean cloth.
Once you have identified the proper lubricant for the job, it is essential to make sure that you apply it to all of the moving parts on the tool. This includes any screws, nuts, bolts, and other components that move or are exposed to friction. Be sure to pay extra attention to the joints, as this is where most of the wear and tear will occur.
When lubricating your tools, it is also essential to inspect them for any signs of wear and tear. If you find any, be sure to address them promptly. While lubrication can help reduce the amount of wear and tear, it cannot fix any underlying damage that may have already occurred.
Finally, it is essential to note that different tools require different types of lubricants. For example, electric tools typically require a particular type of lubricant, while hand tools may require a different type. Read the product instructions to ensure you use the correct lubricant for the job.
By following these tips, you can ensure that your gardening tools stay in good working condition and last for years. Proper lubrication is essential for proper maintenance, so regularly lubricate your tools to keep them in peak condition.
Tip 8: Protect Your Tools from Rust
Rust is one of the biggest threats to the lifespan of gardening tools. Even high-quality tools can develop rust when exposed to moisture, humidity, and changing weather conditions. If left untreated, rust can weaken metal components, reduce performance, and eventually make tools unsafe or unusable.
The best defense against rust is keeping your gardening tools clean and dry. After each use, remove any soil, plant residue, or moisture from the tool before putting it away. Wet soil often contains minerals and organic matter that can accelerate corrosion when left on metal surfaces.
Proper storage is equally important. Store gardening tools in a dry, well-ventilated location such as a garage, shed, or basement. Avoid leaving tools outdoors where they are exposed to rain, dew, and fluctuating temperatures. Hanging tools on wall racks can also help improve air circulation and reduce moisture buildup.
Regular inspections can help you catch rust before it becomes a serious problem. If you notice small rust spots, remove them promptly using a wire brush, steel wool, or a rust-removal solution. Treating rust early is much easier than repairing extensive corrosion later.
Applying a protective coating can provide an additional layer of defense. Many gardeners use light machine oil, mineral oil, or specialized tool lubricants to coat metal surfaces. This creates a barrier that helps repel moisture and reduce the risk of rust formation.
When purchasing new gardening tools, consider choosing models made from rust-resistant materials such as stainless steel. While no tool is completely immune to corrosion, rust-resistant materials generally require less maintenance and often last longer.
By keeping your tools clean, dry, properly stored, and protected, you can greatly reduce rust problems and ensure your gardening equipment remains reliable for many growing seasons.
Tip 9: Replace Your Tools as Needed
Replacing your gardening tools as needed is an essential part of maintaining them. Old, worn-out tools can be more dangerous to use and can cause damage to your plants and garden beds. It’s important to know when to replace a tool and how to identify when it’s time to replace a tool.
One of the most obvious signs that you need to replace your tool is when the tool is no longer working as it should. If the tool is no longer cutting, digging, or doing its job correctly, it’s time to replace it. It may also be time to replace a tool if it’s rusting or showing signs of significant wear and tear.
Another sign that you may need to replace your tool is the age of the tool itself. Over time, tools can become less efficient and reliable, so it’s essential to check the age of your tools occasionally. If the tool is over a few years old, it may be time to replace it with a newer, more reliable model.
You should also check your tools for any parts that may be worn or missing. If you notice that any parts are worn or missing, then it’s time to replace the tool. Worn or missing parts can cause the tool to become less efficient and reliable and lead to unsafe use.
It’s also important to pay attention to the weight and balance of your tools. Over time, tools can become less comfortable and less efficient due to changes in weight and balance. If you notice that your tools are becoming more cumbersome or awkward to use, then it’s likely time to replace them.
Finally, if you notice any cracks or splits in the tool, it’s time to replace it. Cracks and splits can cause the tool to become less reliable and can even lead to accidents. You must check your tools regularly for any signs of cracking or splitting.
In summary, it’s essential to replace your gardening tools as needed. Old, worn-out tools can be more dangerous to use and can cause damage to your plants and garden beds. You should check for any missing or worn parts, pay attention to the weight and balance of your tools, and inspect your tools regularly for any signs of cracking or splitting. Doing so will help ensure you use the best tools for the job.
Tip 10: Use Protective Gear
While maintaining your gardening tools is important, protecting yourself while using them is equally essential. Gardening often involves sharp blades, heavy equipment, flying debris, and prolonged exposure to the elements. Wearing the proper protective gear can help prevent injuries and make gardening more comfortable and enjoyable.
One of the most important pieces of protective equipment is a good pair of gardening gloves. Gloves help protect your hands from cuts, blisters, splinters, thorns, and dirt while also providing a better grip on tools. They can be especially useful when pruning plants, handling rough materials, or working with soil.
Safety glasses or protective eyewear are highly recommended when using cutting tools, trimming shrubs, or performing tasks that may produce flying debris. Even small particles of soil, wood, or plant material can cause serious eye injuries if proper protection is not worn.
Appropriate clothing can also improve safety. Long-sleeved shirts and long pants help protect your skin from scratches, insect bites, sun exposure, and contact with irritating plants. Choosing lightweight, breathable fabrics can provide protection while remaining comfortable during warm weather.
Footwear is another important consideration. Closed-toe shoes or sturdy gardening boots help protect your feet from sharp tools, falling objects, uneven terrain, and accidental slips. Avoid gardening in sandals or open-toed footwear whenever possible.
On sunny days, a wide-brimmed hat and sunscreen can help protect against prolonged sun exposure. Staying hydrated and taking breaks during hot weather can also help prevent heat-related illnesses while working in the garden.
Using the proper protective gear allows you to garden more safely and confidently while reducing the risk of common gardening injuries. Combined with well-maintained tools, good safety practices help create a more enjoyable and productive gardening experience.
Maintenance Requirements By Tool Type
Different gardening tools require different types of maintenance to keep them performing at their best. Understanding the specific care needs of each tool can help extend its lifespan and improve efficiency in the garden.
| Tool Type | Recommended Maintenance |
|---|---|
| Pruners & Secateurs | Clean after use, sharpen regularly, lubricate pivot points |
| Loppers | Remove sap buildup, sharpen blades, tighten bolts |
| Hedge Shears | Clean blades, sharpen edges, oil moving parts |
| Shovels & Spades | Remove soil, sharpen edges occasionally, oil metal surfaces |
| Garden Forks | Clean tines thoroughly, inspect for bends or cracks |
| Hoes & Cultivators | Sharpen cutting edges and remove soil after use |
| Trowels | Clean and dry after every gardening session |
| Watering Cans | Rinse regularly and remove mineral deposits |
| Garden Hoses | Drain before storage and inspect for leaks |
| Wheelbarrows | Clean thoroughly and lubricate wheel bearings |
By matching maintenance practices to each tool type, you can maximize performance and reduce unnecessary wear.
How To Remove Rust From Gardening Tools
Rust is one of the most common problems gardeners encounter when caring for metal tools. Fortunately, minor rust can often be removed quickly using simple household materials.
Step 1: Remove Loose Dirt
Use a stiff brush to remove dirt, mud, and debris from the tool before treating the rust.
Step 2: Soak The Tool
Place the rusted portion of the tool in white vinegar for several hours or overnight. The vinegar helps loosen rust buildup from the metal surface.
Step 3: Scrub Away Rust
After soaking, use steel wool, a wire brush, or coarse sandpaper to scrub away the loosened rust.
Step 4: Rinse And Dry
Rinse the tool thoroughly with clean water and dry it completely using a clean cloth. Any remaining moisture can cause rust to return.
Step 5: Apply Protective Oil
Finish by applying a light coat of machine oil, mineral oil, or tool lubricant to protect the metal and help prevent future rust formation.
Checking tools regularly for rust and treating it early can help preserve their strength, appearance, and performance.
Caring For Wooden Tool Handles
Many gardening tools feature wooden handles that require occasional maintenance to remain comfortable, safe, and durable. Without proper care, wooden handles can dry out, crack, splinter, or weaken over time.
Start by cleaning handles periodically to remove dirt, moisture, and debris. If rough spots or splinters develop, lightly sand the surface with fine-grit sandpaper until smooth.
Applying boiled linseed oil once or twice each year can help nourish the wood and prevent it from drying out. Simply apply a small amount with a clean cloth, allow it to soak into the wood, and wipe away any excess oil.
Inspect handles regularly for cracks, splits, or loose fittings. Damaged handles should be repaired or replaced promptly to reduce the risk of accidents while gardening.
Properly maintained wooden handles provide a comfortable grip, improve safety, and can significantly extend the life of your gardening tools.
Seasonal Gardening Tool Maintenance Checklist
Creating a seasonal maintenance routine helps ensure your gardening tools remain in excellent condition throughout the year. Regular inspections and maintenance can prevent costly repairs and keep your tools ready whenever gardening tasks arise.
Spring
Before the growing season begins:
- Inspect all tools for winter damage.
- Sharpen pruners, loppers, and other cutting tools.
- Tighten loose bolts, screws, and fasteners.
- Lubricate moving parts.
- Replace broken handles or damaged components.
Summer
During peak gardening season:
- Clean tools regularly to remove soil and plant residue.
- Monitor tools for rust and corrosion.
- Check cutting tools for sharpness.
- Store tools in a shaded, dry location after use.
- Replace worn grips if necessary.
Many gardeners use this period to maintain herb gardens that provide fresh ingredients for homemade teas.
Fall
As gardening activities slow down:
- Deep clean all gardening equipment.
- Remove rust and sharpen blades.
- Apply protective oil to metal surfaces.
- Inspect handles for cracks or splinters.
- Repair or replace damaged tools before storage.
Winter
During the off-season:
- Store tools indoors whenever possible.
- Organize sheds, garages, or storage areas.
- Oil wooden handles to prevent drying and cracking.
- Review which tools may need replacement next season.
- Prepare equipment for spring gardening tasks.
Following a seasonal maintenance schedule can significantly extend the lifespan of your gardening tools and improve their overall performance.
Common Gardening Tool Maintenance Mistakes
Even experienced gardeners sometimes make maintenance mistakes that shorten the lifespan of their tools. Avoiding these common errors can help keep your equipment in top condition.
Leaving Tools Outdoors
Exposure to rain, humidity, and sunlight can quickly cause rust, fading, and deterioration.
Storing Wet Tools
Moisture left on tools can lead to rust and corrosion, especially on metal surfaces and moving parts.
Neglecting Sharpening
Dull blades require more effort to use and can damage plants by creating rough cuts.
Ignoring Small Rust Spots
Minor rust can spread quickly if left untreated, eventually weakening the tool.
Using The Wrong Tool For The Job
Using tools beyond their intended purpose can bend, crack, or permanently damage them.
Skipping Lubrication
Moving parts such as hinges and pivot points require occasional lubrication to operate smoothly.
Failing To Inspect Tools Regularly
Small problems are often easier and less expensive to fix before they become major issues.
By avoiding these common mistakes, you can improve safety, reduce replacement costs, and keep your gardening tools functioning efficiently for many years.
Frequently Asked Questions
How often should gardening tools be cleaned?
Gardening tools should ideally be cleaned after every use. Regular cleaning helps prevent rust, removes plant residue, and reduces the spread of plant diseases.
How often should I sharpen gardening tools?
Most cutting tools benefit from sharpening at least once or twice during the growing season. Tools used frequently may require more frequent sharpening.
What is the best oil for gardening tools?
Light machine oil, mineral oil, and specialized tool lubricants are commonly used to protect metal surfaces and lubricate moving parts.
Can rusted gardening tools be restored?
Yes. Minor rust can often be removed using white vinegar, steel wool, a wire brush, or commercial rust-removal products.
How should gardening tools be stored?
Store gardening tools in a clean, dry, well-ventilated location such as a shed, garage, or basement. Hanging tools on racks helps prevent damage and improves organization.
When should gardening tools be replaced?
Tools should be replaced when they develop severe rust, cracked handles, broken components, or structural damage that affects safety and performance.
Are expensive gardening tools worth it?
Higher-quality gardening tools are often made from stronger materials and can last significantly longer when properly maintained, making them a worthwhile investment for many gardeners.
Final Thoughts On Maintaining Your Gardening Tools
Properly maintaining your gardening tools is one of the best investments you can make as a gardener. Clean, sharp, and well-cared-for tools not only perform better but also last significantly longer, helping you save money while making gardening tasks easier and more enjoyable.
By developing simple maintenance habits such as cleaning tools after each use, storing them properly, sharpening blades regularly, lubricating moving parts, inspecting equipment for damage, and protecting metal surfaces from rust, you can keep your gardening tools in excellent condition throughout the year. These small efforts can greatly improve efficiency and reduce the likelihood of unexpected repairs or replacements.
Remember that gardening tools are essential partners in every successful garden. Whether you’re planting flowers, growing vegetables, pruning shrubs, or maintaining landscaping, properly maintained tools help you work more safely and effectively.
With regular care and attention, your gardening tools can remain reliable for many years, allowing you to spend less time dealing with equipment problems and more time enjoying a healthy, productive, and beautiful garden.
Post Disclaimer
The information contained in this post is for general information purposes only. The information is provided as is and while we endeavour to keep the information up to date and correct, we make no representations or warranties of any kind, express or implied, about the completeness, accuracy, reliability, suitability or availability with respect to the website or the information, products, services, or related graphics contained on the post for any purpose.
These statements have not been evaluated by the FDA and are not intended to diagnose, treat, cure or prevent any disease or health condition. If you have specific healthcare concerns or questions about the products displayed, please contact your licensed healthcare professional for advice or answers.